In early May 2005 I ordered an Epson Stylus Photo R-1800 printer - the wide carriage (13 inch) version of the R-800. I had seen samples of glossy prints from an R-800 that looked pretty decent and so I thought maybe I can now replace the 1280 dye-based printer with a printer using longer-lived pigment-based inks. Since May, of course, the Epson Stylus Photo 2400 was announced and I did reconsider if I had made the right choice. The situation was made worse when I was told that 2400s were readily available but Epson Canada in fact had no R-1800s in stock! I opted to stay with the R-1800 for three reasons: a) it's cheaper b) it will print on CD/DVDs and c) it holds both photo-black and matte-black inks simultaneously. The printer finally arrived part way through July (2005), and here's my report.
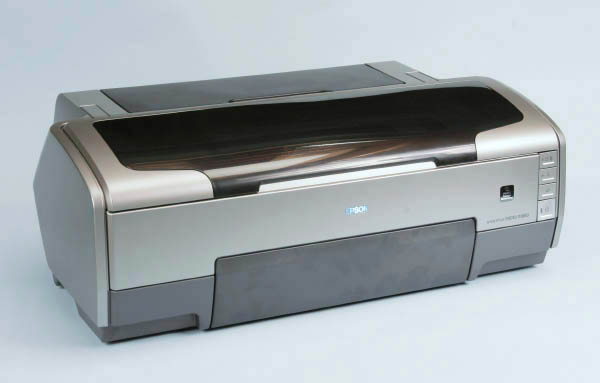
Here's the printer itself with all covers closed.
The printer is about the same size as the Epson 2200: roughly 24 in. wide by 9 in. high and 12 in. deep. It will not fit in the spot where I had my 1280, the height being the main problem. But by removing a shelf in the computer work station I am using to hold two printers, it will just fit. The 2200 sits on top; the R-1800 on a shelf perhaps 10 inches up from the bottom. It's possible I may interchange them. (You may detect already that I have found the R-1800 cannot do everything the 2200 does!)
The printer comes with eight ink cartridges: Matte Black, Photo Black, Yellow, Cyan, Magenta, Blue, Red, and "GO" - for Gloss Optimizer. They are the very same cartridges used in the R-800. And they all install simultaneously. They are not the same colour-set as used in the 2400.
There are three media input trays: a relatively normal flip-up stack loader for most types of paper, an add-on single-sheet feeder for thicker media; this single-sheet feeder fastens to the back of the printer. Note that this printer does NOT provide a straight-through path as would be required for really thick media. And this is mainly why the R-1800 cannot fully replace the 2200 in my case. The third input tray folds out from the front to accept a CD/DVD holder. All media go in with the printable side facing the operator. The single-sheet feeder can be replaced by a roll holder. There is no paper knife, as there is with the 2200. (I have never used the 2200 cutter, because none of the papers I would use with the 2200 is available in rolls!)
The printer comes with a power cord (at least in North America) and a Firewire interface cable, but no USB cable. The Firewire cable looks like a high-quality cable, with ferrite noise/interference suppression devices at both ends.
Esthetically, it's about the nicest-looking Epson printer I have seen. Colours are silver and charcoal.
The printer operates quietly: quietest printer I have experienced. And speed is good: a 13 by 18 inch print is produced in "Best Photo" mode in about 10 minutes. (The 1280 takes about 25 minutes.)
As noted elsewhere on this site, I'm mainly a Mac user, and Mac OS-9 at that. The R-1800 is offered in North America with OS-X and Windows drivers only: no OS-9 driver (which is available for the related R-800). Nevertheless, I'm happy to report that I experienced none of the show-stoppers I have found with other printers under OS-X 10.2.8 and 10.3.4. That is to say, prints come out of the printer the right size and properly positioned on the page. I did experience two minor issues: if the printer is on when OS-X starts up, I have to turn the printer off and back on again before the computer will recognize it, and I also found that the Epson Printer Utility (for checking ink levels, nozzle checks, head cleaning etc.) would not work until I had first made a print! When I had not yet made a print, the printer would show up in the appropriate dialog box, but asking for any action would result in "Communication Error". Once a print was made, however, the problem went away. An annoying, but lesser, initial problem was that whenever attempting to print on CDs, I would be told (twice!) that "The software necessary to print on CDs is not available on this computer". Nevertheless, the printer would go ahead and print the CD! The problem was solved by downloading and installing Epson EasyPrint. It was not provided on the CD that came with the printer - at least not the Mac version. It does seem to have been installed on my WindowsXP system. Don't install EasyPrint when you are in a hurry: the first time it is required - as when starting Print CD - it takes about 10 minutes to configure itself.
After a little investigation, I discovered that the Epson European and Australian sites have a "Classic Mac OS" version of the driver which is claimed to work with OS 8.6, although 9.1 is recommended. Also, the European and Australian Windows drivers appears to work with Windows systems as early as Windows 98. I can confirm that the Classic Mac driver works with OS 9.2, 9.1 and 8.6, albeit a little slower than with OS-X. The slower performance under OS-9 appears to be due to the fact that OS-9 does not support USB 2. The Firewire interface allows quicker printing. For Systems 8.6 and 9.1, I used an older 500 MHz G3 Mac; it had a bit of trouble keeping up with the printer, but printing times were still acceptable. I have tested the printer with OSs 8.6, 9.1, 9.2.2, 10.2.6, 10.2,8 and 10.3.4, as well as Windows XP. I can also confirm that it can be connected simultaneously to two computers: one via Firewire and one via USB. A minor downside of using the European driver is that there is no selection for Enhanced Matte paper - one uses "Archival Matte" instead. And, of course, the default paper size is A4!
I cannot say I am happy with the OS-X printing interface in general. It is very easy to overlook important settings, or even to apply totally inappropriate ones. This is probably at least as much Apple's fault as Epson's. To give one example of what I mean, in order to print on CDs or DVDs, one must, of course, choose that medium. But where? It turns out that you do it in "Page Set-up" - which is not surprising - except that one must first choose A4 paper, before the CD/DVD option is visible in a sub-menu! And the ideosyncracies go far beyond that. I won't go into great detail, let's just say there's definitely a learning curve! This sort of problem seems to be what Epson EasyPrint is attempting to resolve - but few applications support it so far.
Looking at the printed manual provided, the Windows driver (Windows 2000- and XP-only, in North America) appears to be designed a little more logically. I installed the Windows Driver on Windows XP under Virtual PC (version 6) running on the Mac. In actual use I did not find it as much better than the Mac version as I expected. Some settings did not 'stick' from one printing to the next, and I was able to select inappropriate options. For example, using plain (bond) paper, I was allowed to select gloss optimizer "on", although there was no evidence that it actually applied the optimizer to the print. In my view there should be a warning message when inappropriate settings are made. It was almost as easy under Windows to forget to make critical settings: three windows needed to be opened to see all the possible settings. Printing speed under XP/Virtual PC was slower than on OS-X, but I believe that's because, although VPC recognized that the printer is capable of Hi-Speed USB 2.0 communication, VPC is currently restricted to USB 1.1 speeds.
Something I regret not seeing during the printing process is any reference to the printer resolution being used. Instead, there are several printing modes such as Photo, Best Photo and Photo RPM - among others. Not all modes are available for all media types. And there is no explanation in the manual of what the mode selection implies apart from these words: "Specify...Photo RPM for the highest quality (5760 x 1440 dpi) on certain paper types." That's it, you figure out the rest! The Photo-i review translates some of the settings into dpi: "Photo" = 1440 dpi, "Best Photo" = 2880 dpi and "Photo RPM" = 5760 dpi. The latest batch of profiles available on the North American Epson site includes profiles for RPM mode that were not on the CD supplied with the printer. Incidentally, the Australian Epson site translates "RPM" as "Resolution Performance Management".
Apart from the above, the printing experience pretty much follows past Epson experience. One can choose to print with "Color Controls", with "ColorSync" or with "No Color Management" (this latter selection essentially means: set the colour management in Photoshop). For use with ColorSync or "No Color Management" Epson provides media and mode-specific profiles for a number of Epson Media. Generally speaking, where appropriate profiles are available, I got the best results using these profiles. There's a new (to me anyway) option to choose "Epson Vivid", "Epson Standard" or "Adobe RGB" mode when printing in colour. There's no guidance in the printed manual, but the on-disk help offers some limited information about this. "Adobe RGB" is stated to permit the widest gamut of colours and is recommended for printing photographs. In my limited experimentation, this setting did indeed produce the most natural-looking results. Somehow I doubt that the average photographer will think to pick "Adobe RGB" as the preferred mode when "Epson Vivid" is the default.
The on-disk help file indicates that there is no automatic "fit-to-page" option with this printer under OS-X. There is still such a setting under OS-9. And that option does still exist under Windows. It is true that the usual "fit-to-page" option under Layout is gone under OS-X. I find this surprising, as it seems to me that all one has to do is to set the required magnification factor in the Page Set-up dialog box. It's just that now one has to calculate that factor manually.
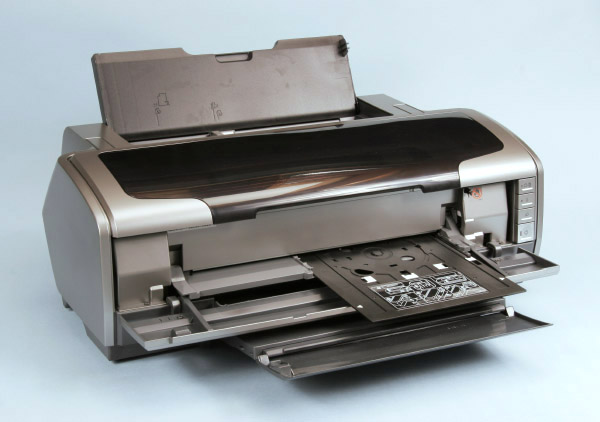
Here we have the standard stack loader flipped up, the CD printing tray open (with CD holder in place) and the output tray open.
Generally, print quality is up to the expected Epson standard. Colour is good; prints look sharp. And no ink dots are visible to the eye. In direct comparisons, comparing identical images printed on Premium Glossy paper with a 1280 and with an R-1800, colour images are essentially identical. Close examination with a magnifier gives a slight advantage to the R-1800.
As it turns out, they day before the printer arrived, I was explaining to my wife that one of the significant shortfalls I had experienced with ink-jet printers was poor rendition of greens, especially on matte papers. This surprised me, because I had long thought greens were especially important to the Japanese. Japanese printers should produce good greens. Why did the R-1800 come equipped with Red and Blue inks but no Green ink? I need not have worried; the R-1800 does great greens!
I was, of course, anxious to try out printing in black and white, and to check for metamerism effects as well as differential gloss on glossy media. Results were good overall, with a few caveats.
They very first image I printed was on plain paper using "Color Controls". It was somewhat magenta, but otherwise pretty good for plain old bond paper.
Glossy paper: Then I printed the same image on Premium Glossy paper, again using "Color Controls" and with Gloss Optimizer "on". The result was essentially equal to what I had seen with the 1280, except that the print looked a little bit magenta. I thought about correcting, and making another print, but did not. Just as well! I had been evaluating the print under tungsten light. When I looked at it in daylight, the colour was right on! OK, so there is metamersim - sometimes. Then I repeated the print using the Premium Glossy Best Photo profile. This print looked right under both tungsten light and daylight! So, yes, there may be metamerism, but it may depend upon the profile and/or printing mode you use! Even comparing the two prints directly with one-another, under tungsten light they look different while under daylight they look near identical. Around the edges of the glossy prints there is a "matte" border. But when I compared the R-1800 print against a 1280 print I got a surprise. That "matte" border had the same gloss as the entire 1280 print! The gloss is indeed enhanced (made shinier) by the ink and/or gloss optimizer. Prints without the gloss optimizer show some differential gloss: white skies - even if just a very light gray - show the native gloss of the Premium Glossy paper; more heavily inked areas are glossier. But there's another reason TO use the gloss optimizer. I tried rubbing the print surface with a soft wet tissue. No inks ran, but the lightly-inked areas without gloss optimizer became sticky. Not real sticky, but nevertheless enough to cause prints to stick together. Where the gloss optimizer was used (or where the paper was heavily inked) the print surface remained essentially un-wetted; the water could be removed with a dry tissue or cloth, and the surface was free of any tendency to stick. Prints made on Premium Glossy paper, using the gloss optimizer, are essentially waterproof! At least for casual wetness, I did not try giving prints a real long-term soaking. I discovered, however, that continuous rubbing for about 20 seconds with a wet paper towel will remove portions of the image entirely! In a comparison test with a 1280 (dye ink) print, the wet paper towel did smudge the ink a bit, but the image did not disappear even after 40 seconds of rubbing. So, which printer produced the more waterproof print depends to some extent upon the test conducted! There is some bronzing - variation in the colour of light specularly reflected from the paper surface - but the effect is minor and I expect many people would not notice it at all unless it is specifically pointed out to them. The water-proof, long-lived nature of the print outweighs this minor bronzing problem in my view.
A curiosity is that the Classic Mac and Windows drivers allow one to restrict the Gloss Optimizer to just the printed area or apply it to the whole page, while the OS-X driver only applies it to the whole page. Or, if there is a choice under OS-X, I have not found the setting yet. Actually when the Gloss Optimizer is in whole page mode, it is not applied within about 2 mm of the paper edge unless borderless printing is chosen.
Semi-gloss and Luster papers: A print on Premium Semigloss paper with Gloss Optimizer "on", also showed enhanced gloss, but retained the texture of the surface. The overall gloss effect was about mid-way between the natural Premium Glossy finish and that with the Gloss Optimizer added. But, of course, there is a fine texture with the Semigloss. In fact, the added gloss tends to amplify the natural texture of the Semigloss medium. The result is somewhat more of a lustrous finish than semi-gloss. Some Bronzing was evident, as with the Premium Glossy paper in "Best Photo" mode. In "Photo RPM" mode, the gloss is a little lower, there's a hint of differential gloss and the bronzing is almost absent! Strange that the two printing modes yield different results with respect to gloss!
A print on Premium Luster paper (with gloss optimizer 'on') does indeed look pretty close to Kodak's "E" surface, as advertised. The gloss optimizer seems to have a little less impact on the surface of this paper than the two previously mentioned, although it does still increase the 'shine', and prints made without it do show some differential gloss.
Generally speaking, the Premium Semigloss, with gloss optimizer, looks rather like conventional fiber-based glossy paper that has been air dried - except that the surface pattern looks more random for the conventional fiber-based glossy paper. The Premium Glossy paper, with gloss optimizer, looks like a ferrotyped conventional glossy print, and glossier than most 'glossy' RC papers.
Matte papers: Prints on Photo Quality Ink Jet Paper are far superior colour-wise to those made with an Epson 1280. And I never did manage to fine tune my own custom profile for the 2200 with this paper. This is the paper that has had the greatest problem with greens; with the R-1800 that problem is simply gone. Blues looked slightly better too. The weakest colour is now yellow. The R-1800 also wets this paper less than does the 1280, and so the paper dries with fewer wrinkles.
Next I made a black and white print on enhanced matte paper (using Color Controls). The result was surprisingly good. The print was sharp and free of any variation in colour. It did not seem to show any metamerism either. But it would not fool me into thinking it might be a "real" silver print either. The tone was quite blue or cool - about equal to the maximum cool setting when printing with the Quad-Tone RIP on the 2200. Another print, using the Enhanced Matte Best Photo profile, produced a somewhat warmer print: still a bit cool when compared to a typical silver print, but actually quite close to a neutral when compared with a Kodak gray scale. These are the best black and white prints I have yet seen from an Epson printer using an Epson driver! I will not be embarrassed to exhibit B & W prints made with the R-1800 on Enhanced Matte paper.
(This encouraged me to try a black and white print on Premium Glossy paper. Results were not as good. A print made with Color Controls was definitely too cool and exhibited significant metamerism; a print made with the Premium Glossy Best Photo profile was better: less cool and showing less metamerism, but still definitely cyan in tone when compared to a silver print. I at first thought there was some tonal (colour) variation in these prints on Premium Glossy paper: some grays looked a little magenta. However, after drying overnight, this tonal variation mostly seemed to disappear. Yet, the result would never be mistaken for a 'real' B & W print.)
The good results with Enhanced Matte paper encouraged my to try printing in black and white on Velvet Fine Art paper. The results were a mixture of good and not-so-good. Using the profile provided did produce the better result, but the print colour was definitely green (olive) either way. That's the not-so-good result, although I did not find the green tint bothered me as much as usual. I guess it is more of an olive than a green tint. The good result was that if one could ignore the image colour, the print was actually very good - perhaps the best rendering of that particular image I had ever made, by whatever process. Apart from image colour, the only slight problem was that the image was a bit dark. Hoping that the R-1800 might have the same ink control as the 2200, I looked for an appropriate ink control setting in the driver. Unfortunately, no such control was found. It will be necessary to lighten the image in Photoshop rather than in the print driver. A colour print on 'Velvet' also showed a result of too much ink. These prints looked great under strong illumination, but dark under more typical viewing conditions. Maybe it was the humidity.
Two weeks after making the print on Velvet Fine Art paper, the image colour appears to have become more neutral! The green cast seems to have disappeared - under some lighting conditions, anyway!
Other printing observations: While the printer diver pretends to offer me the opportunity to print with black ink only, the result obtained (using a gray-scale image) was identical to that achieved using the "color" selection. And close examinations using a magnifier revealed an identical - and coloured - dot structure on both prints!
Printing on printable CDs required bumping up the ink one notch - there is an ink control here! - but the instructions warn against applying too much ink. The concern is that the ink might remain moist and sticky and interfere with drive mechanisms. Images were generally good except that the reds looked under-saturated. My printed CDs seemed adequately dry after only 10 minutes. Strangely, the images on CDs do not appear to be fully waterproof!
A test print on transparency material resulted in the inks pooling in the denser (more inked) areas leading to a reticulated look. Lightly-inked areas were OK. The ink did adhere once dry, but could be scraped off easily with a fingernail. Yes, it will work in a pinch, but you'll get better results with a dye-based printer like the 1280.
This reminds me of a problem I experienced with the 2200. Mechanical durability of 2200 prints is generally excellent - unless you heat them. I found that heat-mounted 2200 prints were somewhat fragile; they can be damaged easily by an accidental encounter with the back of one's fingernail, for example. I tested the R-1800 prints after heating to mounting temperature - I did not actually mount them. I'm happy to report that the R-1800 prints seemed to retain their scratch resistance even after heating. The premium glossy paper did seem to become slightly puckered in the process, although in the past they have mounted just fine.
Borderless printing worked, although I find Epson's way of doing it less than fully satisfactory. First one must set the image to cover the full size of the paper, then the printer driver trims a bit off and expands the rest to fit! There are three expansion settings available, but they are not stated quantitatively: just Minimum, Medium and Maximum. One needs to experiment to determine which is needed. The result is satisfactory from a pictorial perspective, but if precise scaling of the image is required, it can't be had in borderless mode. This is normal for Epson printers, not specific to this one.
Ink usage has been interesting over the first two months of use. I produced more prints with the first set of cartridges than I expected. The greatest consumption seems to be with the cyan and magenta inks. In fact they ran out simultaneously twice before the yellow cartridge needed changing. About the time the cyan and magenta ran out for a third time, the photo black and gloss optimizer ran out and I changed all five at the same time. Then when the cyan, magenta and yellow needed changing again, the matte black was also out, so, four cartridges were changed simultaneously. Next to run out was the blue, and I did not have to change the red for some time yet. I thought the gloss optimizer would be gone in no time, but it appears to track the photo black consumption. Remember too, that one gets two gloss optimizer cartridges per box. My recommendation would be to always keep two cyan and magenta cartridges on hand; one in reserve for each of the others will probably suffice.
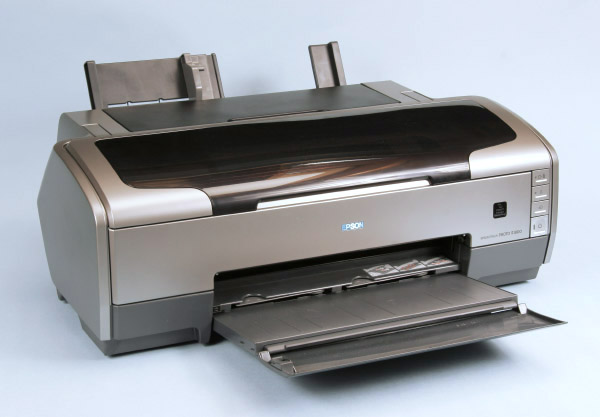
The standard stack loader and CD tray are closed, but the output tray is open and the single-sheet feeder has been attached to the back of the printer.
In general, then, this is a fine printer: a definite improvement over the 2200 for the average user. Colour is good, Black & white is significantly better than the 2200 with Epson driver. Will I get rid of the 2200? No, I still need to print on thick media occasionally and so need that straight-through path. (The R-1800 does physically have a straight-through path limited to the width of A4 paper. This path is used for the CD printing tray, but it is not yet clear to me if it can be used for printing on other A4-width materials.) Will the R-1800 replace my 1280? For printing on Photo Quality Ink Jet paper - which I use a lot of - the R-1800 will be used. For glossy paper I'll probably use the R-1800 whenever waterproof qualities or print longevity are important, but may still use the 1280 for some limited purposes. For the best looking prints on Premium Glossy paper - at least in the short term - the 1280 is still 'king' in my books, but the margin is small. Still need the 1280 for transparencies too.
Will this printer cause me to use OS-X more often? Definitely. I finally have an OS-X colour printing solution I can live with. I think the Mac OS-X driver is poor from a user interface perspective, but at least it does what it is supposed to do. But I was delighted to find a Mac Classic driver on the European Epson site.
Will I use the R-1800 for B & W? For prints on Epson Enhanced Matte paper, yes. I still think the QuadTone RIP in conjunction with the 2200 produces a slightly better-looking grayscale image on matte papers, however. The R-1800 produces better-looking B&W on glossy media than the 2200 (because of differential gloss/bronzing effects), and better than the 1280 (because of less variations in image colour), but I can't really say I'm fully content yet with any B & W results on glossy papers using ink jet printers.
Several people I know bought Epson 2200s even though I advised them against it. In retrospect they all wish they had bought 1280s instead. I believe they would be happy with R-1800s. The R-1800 is a good choice for the average photographer. The 2200 is for specialists dealing with matte papers (other than Photo Quality Ink Jet paper) and/or thick media.
What about the HP 7960 and its gray inks? Well, I'd have to say that the 7960 B & W prints are not wearing well on me. The more I look at them, the more I see an image that turns me off for some reason I don't yet understand. For quick small B & W prints to give away, I'll probably use the 7960. And I still applaud HP for making the effort to market a printer with a built-in, easy-to-use gray ink B & W solution.
What about the Epson 2400 and it's B & W printing mode? I have not yet seen any results from a 2400, but see the link two lines below for an opinion. After looking at a downloaded 2400 manual, I get the impression that the 1800 and 2400 are nearly identical. The main difference apart from the ink-set is that the straight-through path is restricted to printing CDs in the case of the R-1800 while the adapter needed for CD printing is not provided with the R-2400. I expect the R-2400 could easily print on CDs using the adapter from the R-1800. And I expect the R-1800 could be modified to have a fully usable straight-through path. Additionally, I expect that the B&W printing mode software for the R-2400 could be adapted to work almost as well with the R-1800. One needs to ask why the price differential between these printers is as great as it is.
A PDF file describing image permanence for the R-1800 can be found here (www.wilhelm-research.com/epson/WIR_Ep_R1800_2005_02_14.pdf).
Vincent Oliver's Photo-i site has detailed reviews of the Epson R-1800 and R2400 printers. It may be noted that there is a Classic Mac (OS 9.1) driver for the R2400 also, on the European Epson site.
The printer has been doing well; I use it a lot. The speed and quiet are easy to get used to. When I revert to any of my other printers I often think something is wrong because they seem so noisy and seem to be taking so long. In a test comparison between the 1800 and the 2200, I started one print on the 2200 then completed two identical prints (with different settings) on the 1800 before the 2200 finished. As the 1800 began printing I initially thought it had stalled; I could not hear any noise coming from the 1800 while the 2200 was in operation!
I have encountered problems with some paper-specific profiles. As noted above, most prints seem to print best using the profiles provided. But some Canon S-80 photos taken in the Fall of 2005 in the Napa Valley and at Yosemite National Park print with purple skies whenever using these paper and resolution-specific profiles. Using "Color Controls" (all set to 0) with the Epson SPR1800 Standard profile, the skies look just like they do on the monitor. Using either method, the rest of the colours match. The S-80 files are sRGB files. If I arbitrarily assign the AdobeRGB1998 profile and re-adjust the colour balance on the monitor (to regain the colour balance the sRGB image had) prints using the two settings match fairly closely! No purple skies either way! As noted earlier, the profile choice does seem to influence metamerism too. Even the "mode" choice (Epson Standard, Epson Vivid or Adobe RGB) influences metamerism. Curious. Blues also turned somewhat purple for one flower photo. I would have expected the availability of a blue ink to prevent this. All I can say is that a 1280 print of the same image was slightly worse, showing essentially no blue at all.
Something has definitely changed since I first tested the printer's B&W printing on Epson Velvet Fine Art paper. The prints are now quite satisfactory. The greenish colour has vanished and in some respects the result is even better than printing B&W on Epson Enhanced Matte paper. What has changed? My best guess is that somewhere along the way I updated the profiles. And the new Velvet Fine Art profile works much better than the old one.
One of the slight problems I encountered with B&W printing on Epson Enhanced Matte paper was that significant areas of deep blacks will appear to have a non-uniform sheen when viewed under some lighting conditions. The problem is even worse - exhibiting a definite pattern - with Epson Watercolor paper, making that paper unuseable with the 1800 to my mind. The problem is absent, however, with Velvet Fine Art paper, or indeed, with Hahnemule's Photo Rag paper.
Roy Harrington's QuadTone RIP (for b&w printing) now includes profiles for the R-1800 with the Epson inks. Results in my tests were not acceptable, however. The prints are very grainy, and, using the recommended "ordered" dither pattern results in fuzzy stripes appearing in the image. The "adaptive hybrid" dither pattern was much better, but significantly inferior to similar prints made on the 2200. The good news, I guess, is that in one recent test I found the native Epson B&W R-1800 print superior to what I could do with the QuadTone RIP on the 2200. I expect improved profiles will address the current deficiencies in using the QuadTone RIP with the R-1800.
The pattern of ink usage has continued as described earlier. Cyan and Magenta are normally used at equal rates that are almost exactly half of the yellow consumption. (In September 2006. however, after printing a number of lare images containing a lot of green, that pattern was broken.) Matte Black, Photo Black and Gloss optimizer have been about equal to one another with consumption a little lower than for yellow. Blue consumption is significantly lower than for yellow and Red is lower yet. Cartridges often need to be changed in multiples; I have once needed to change six at one time! One series of photos (church interiors with lots of dark wood - quite dark in overall tone) used more Matte Black ink than I ever would have expected - more than cyan or magenta - but that's been a unique experience so far.
Recently Epson introduced an Ultra Premium Glossy Photo Paper. As it turns out, this paper is probably a better match for the R-1800 than Epson's Premium Glossy Photo Paper. I mentioned earlier that with the original Premium Glossy Photo paper, the printed area is glossier than the un-printed area (with the Gloss Optimizer turned on). The gloss differential is substantially less with the new Ultra Premium paper. One downside of the Ultra Premium paper is that it appears to contain more 'brighteners' than the regular Premium Glossy paper. (Brighteners are materials that fluoresce in the presence of ultra-violet light and thus make the paper appear whiter than it really is. Most papers these days use brighteners, but Premium Glossy uses less than most. Brighteners will tend to degrade over time.)
The gloss issue reminds me of differences between the OS-9 version and the OS-X version of the printer driver. The OS-9 version allows one to restrict the use of the Gloss Optimizer to the actual printed area, whereas the OS-X driver wants to apply the optimizer to the whole sheet. Fairly frequently, I want to pass a single piece of paper through the printer more than once. One such example is when I want to print two 5 by 8 inch images on a single sheet ov 8.5 by 11 paper. Under OS-X, unless I turn off the Gloss Optimizer completely for all but the last pass, it will be applied to the whole sheet each time - even though I'm only really only printing on a part of the sheet on each pass. I must then remember to turn the optimizer on for the final pass. I have not really tested in detail what happens when either a) one prints on already 'gloss optimized' paper, or b) when gloss optimizer is applied over an image as though the image was blank. After the first mistake I simply resolved to do all multiple-pass printing under OS-9.
I have experienced fewer clogging problems with the R-1800 than with previous Epson printers. I don't believe I have had to run the cleaning routine more than twice at any time. I have, however, had to run a cleaning cycle immediately after changing ink cartridges on three occasions. This seems odd to me, especially as the colours that clogged were not those for which the cartridges were changed. On one of the occassions, only the gloss optimizer was changed yet three inks were almost completely blocked after the change. Furtheremore, this was the only instance where two cleaning cycles were required to restore ink flow.
Originally posted July 2005, updated 3 September 2006.
Back to Digital Black & White page.
Back to Main Page Table of Contents.